Home/ Windows10/ How to Use Shared Experiences Settings in Windows10
Shared Experiences is for cross-platformassistance in Windows10.
Bluetooth tools. Cellphone. Wireless adapters. Wi-Fi. Tablet computers. All these gadgets can interact utilizing this function.
Moreover, allow this attribute to link Android applications.
In order to Send/Receive phone messages and also see phone alerts on your desktop computer.
Another emphasize is that, 2 Windows10gadgets can connect with each various other.
This is just feasible with this setup activated.
Your Phone application in Windows10 will just function if this attribute gets on.
In some versions of Samsung, we can additionally regulate the Android applications from laptop computer.
The benefit in2021is that mobile Settings as well can be regulated.
In this testimonial, allow’s see information regarding shared experiences setups
What are the Cons?
To put it simply, many people often tend to service their desktop computer or laptop computer.
This consists of workplace applications like expectation, succeed, word, note, ppt
However, they do not wish to obtain disrupted with alerts and also messages from their phones.
People wish to utilize the mobile and also desktop computer as different entities.
Above all, vital aspect is the rate!
In enhancement, way too many tools utilizing Shared Experiences will certainly make Windows 10 computer systems sluggish.
For instance, Opening of the Start Menu, use of File Explorer, Group Policy Editor, Apps notices and also others can decrease.
For this function, to accelerate Windows 10, customers disable Shared Experiences entirely.
In the current 20 H2 as well as 2004 upgrade, this system setup can be altered really conveniently.
In this tutorial, we will see 3 approaches to make it possible for and also disable Shared Experiences Windows 10
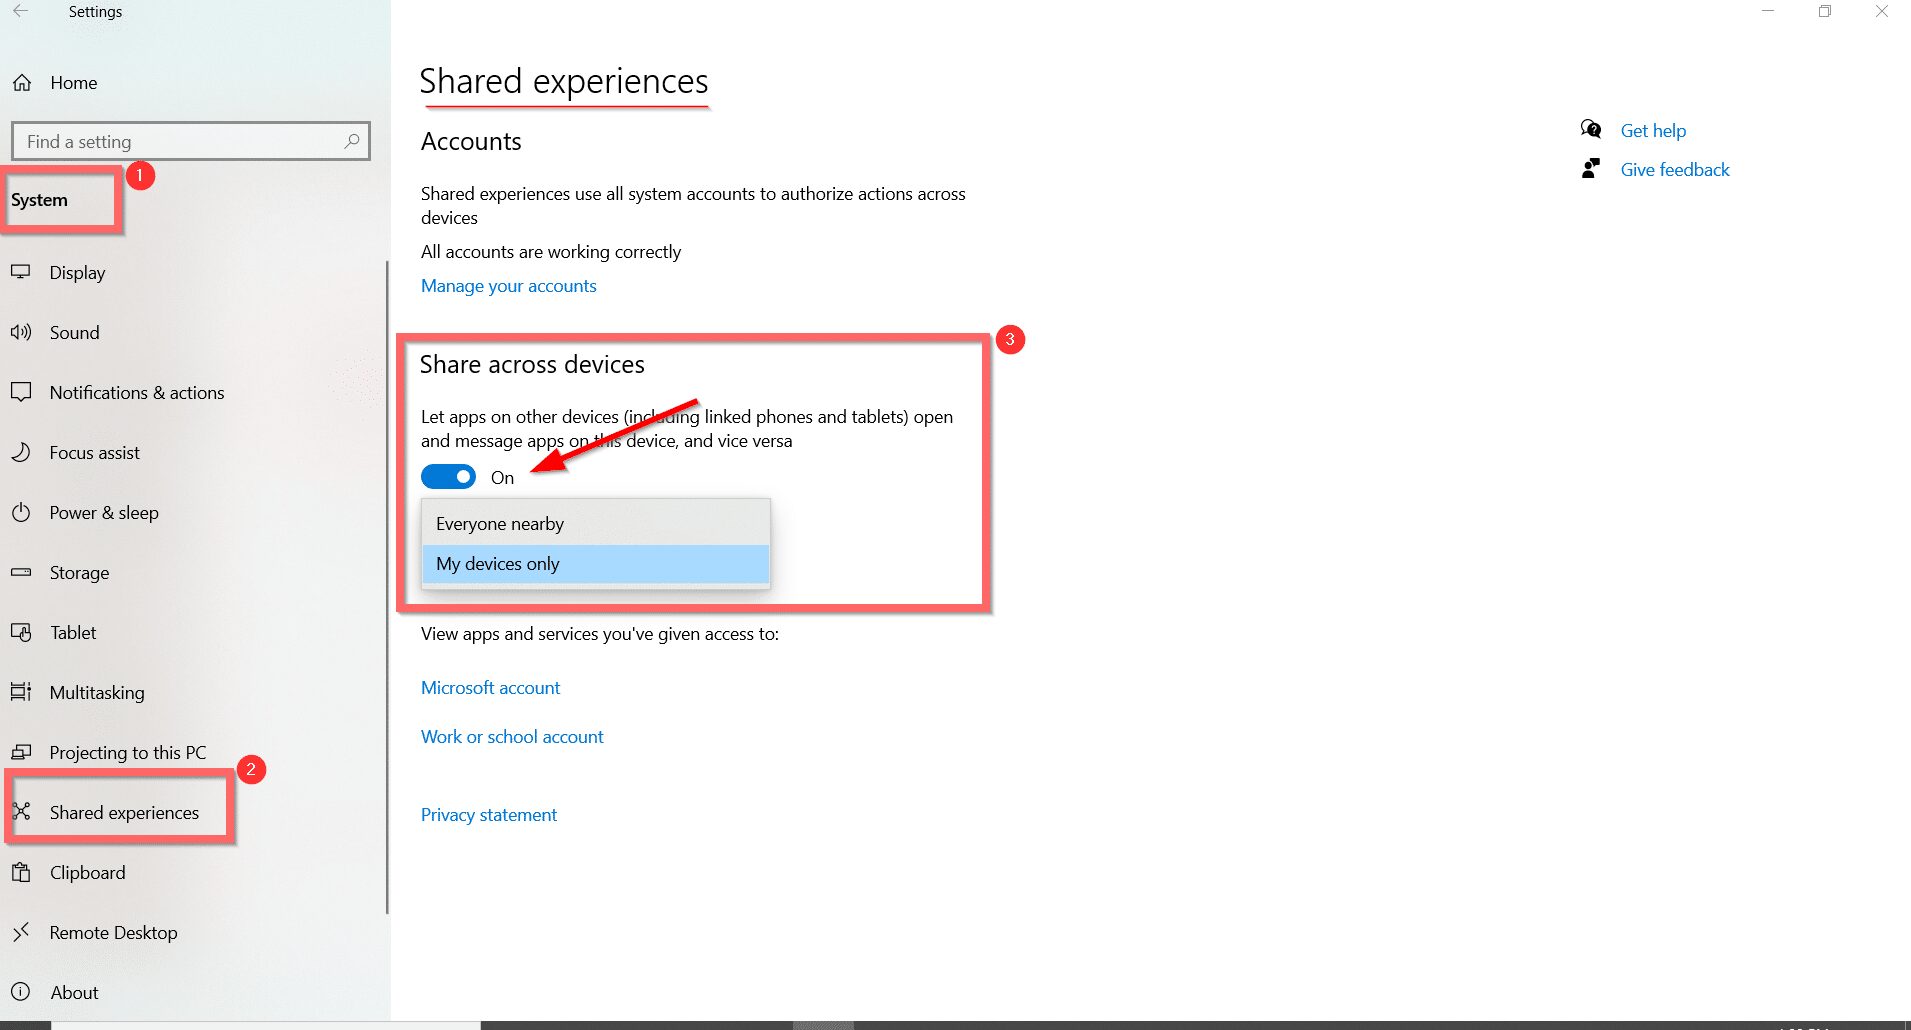
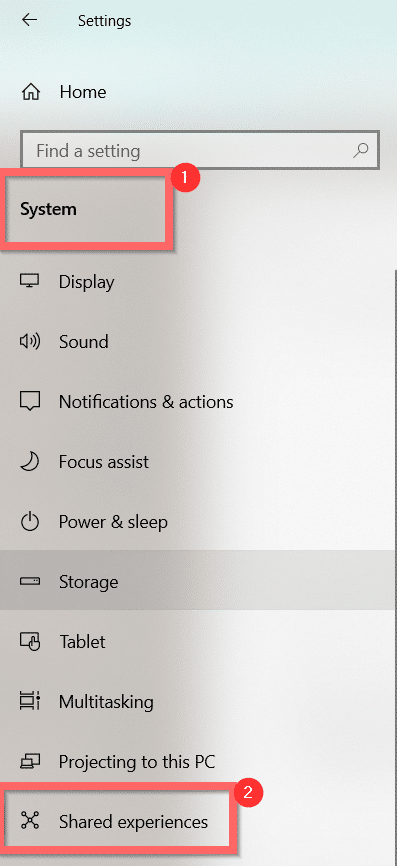
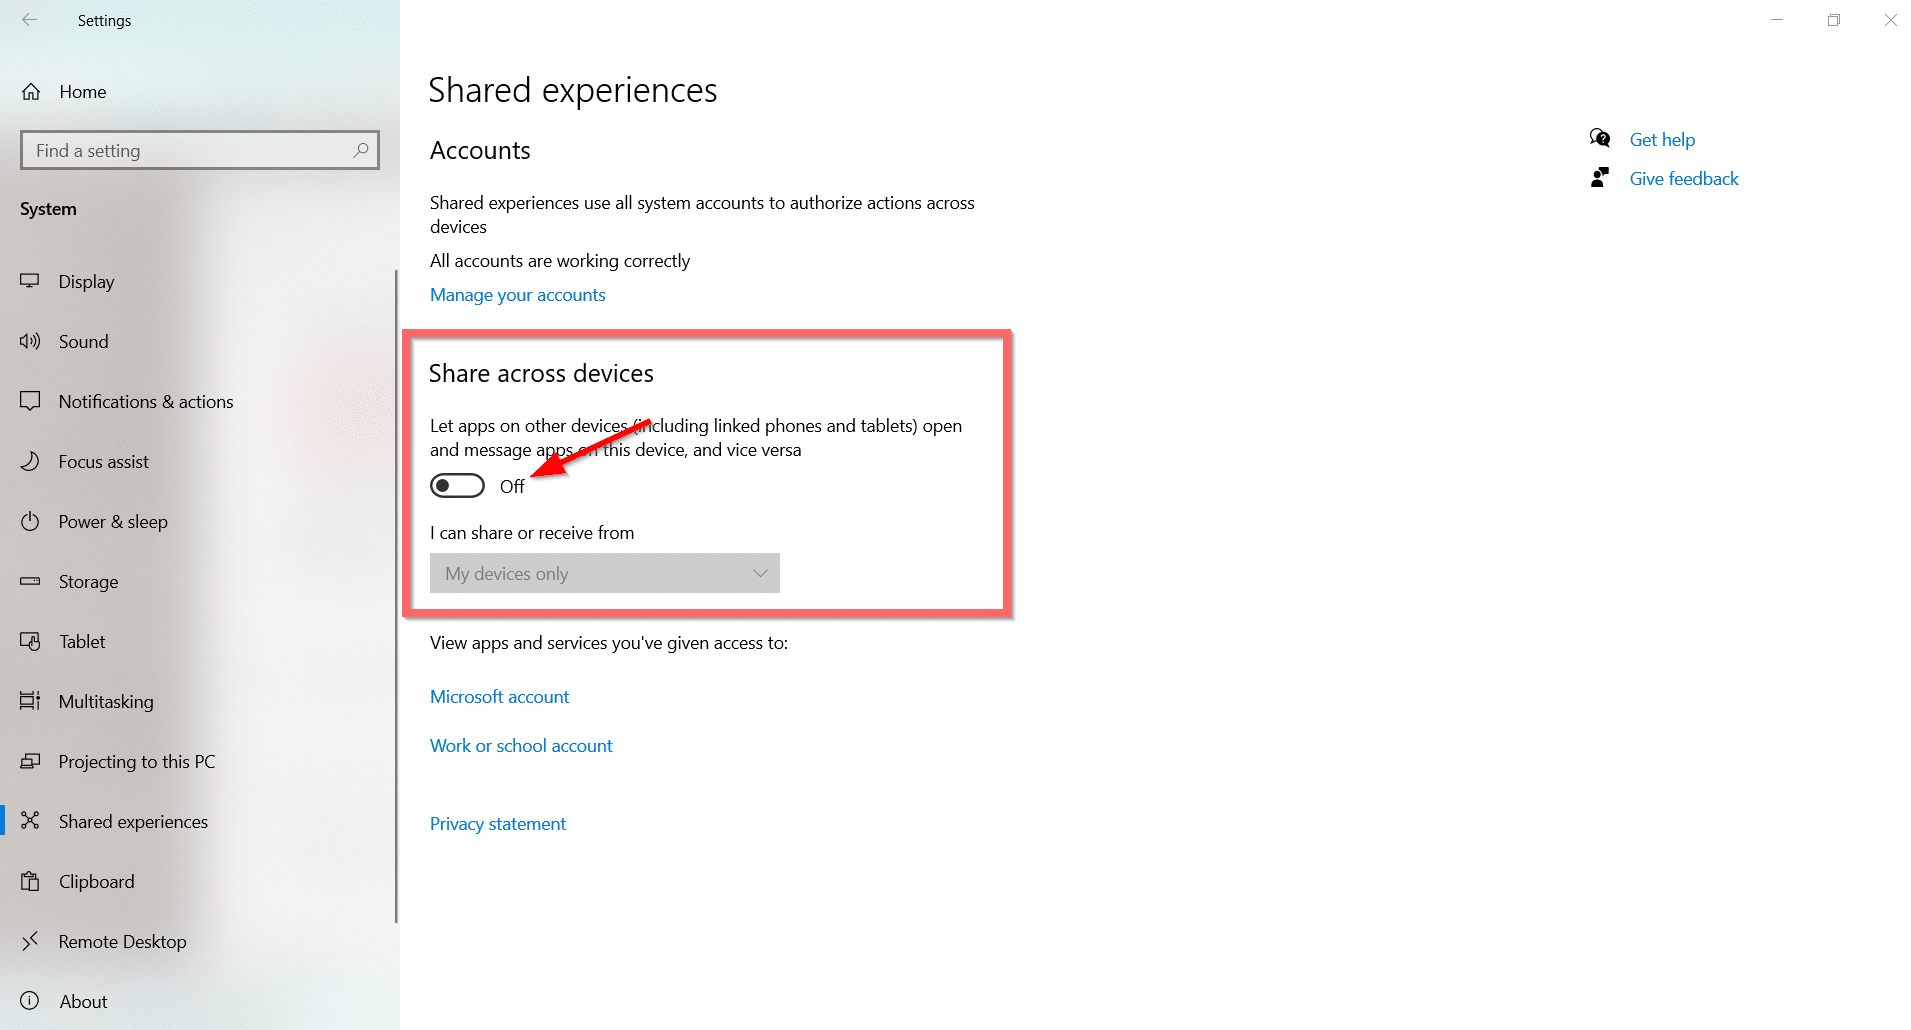
- Press the Win + I tricks with each other to open up the Settings application.
- System > Shared Experiences
- Shared Experiences utilize all system accounts to make cross-platform tools function conveniently.
- Share throughout gadgets is offered listed below.
- To make it possible for Shared Experiences, relocate the slider to ON
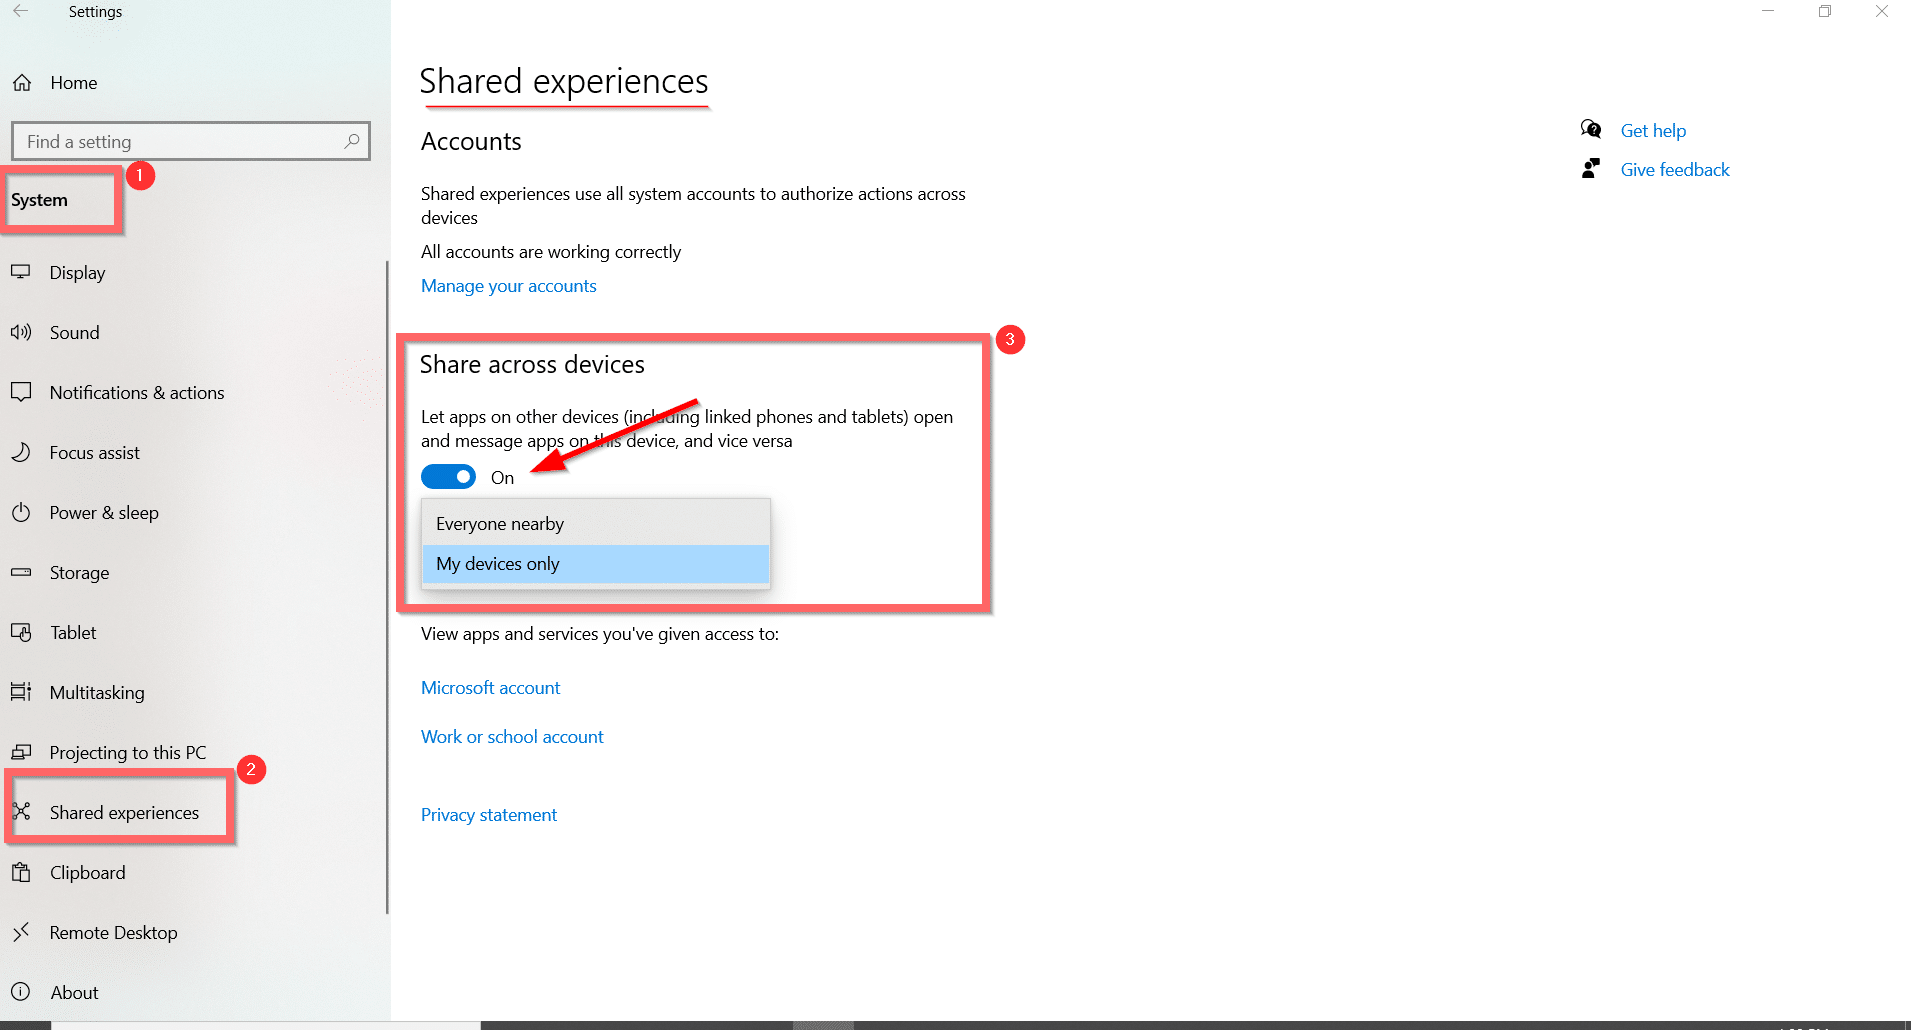
Note: Enable this attribute. Applications on various other gadgets connect with applications on the Windows 10 computer system.
Another 2 alternatives exist below– I can share or get from
- My gadgets just
- Everyone neighboring
The initial choice will certainly allow you interact with your individual or family members gadgets. On the various other hand, the 2nd choice will certainly get in touch with all the tools that are nearby.
- To disable it, relocate the slider to OFF
This YouTube testimonial will certainly speak about “what is microsoft common experience setups”. You obtain a short review of this attribute in Windows10 Exactly how is it beneficial for cross-platfom gadget assistance. Real-guide on just how to make it possible for or disable common experiences. Link Your Phone application and also various other applications to Windows10
Group Policy Editor can be made use of to disable as well as make it possible for the Shared Experience setups.
- Type a couple of words of “regional team plan editor” in the Windows 10 search box.
- “ Edit team plan” as Control Panel product shows up. Click it.
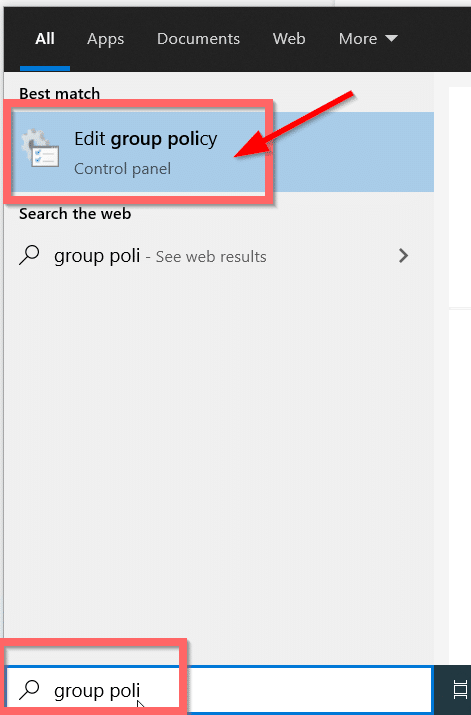
- Alternate method is to kind the command “ gpedit.msc” in the Run dialog box.
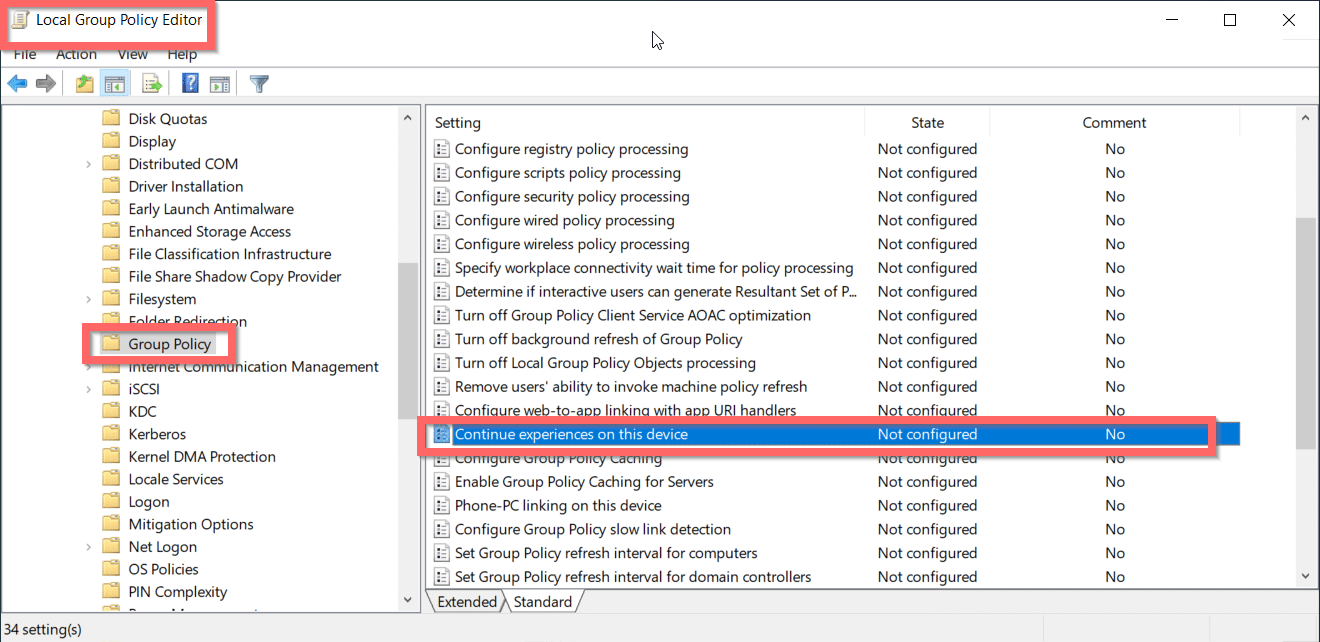
- Navigate to the adhering to course–
Computer Configuration > Administrative Templates > System > Group Policy
- View as “ Standard” on the right-hand side.
- Double-click the setup “ Continue experiences on this tool” on the right-hand side.
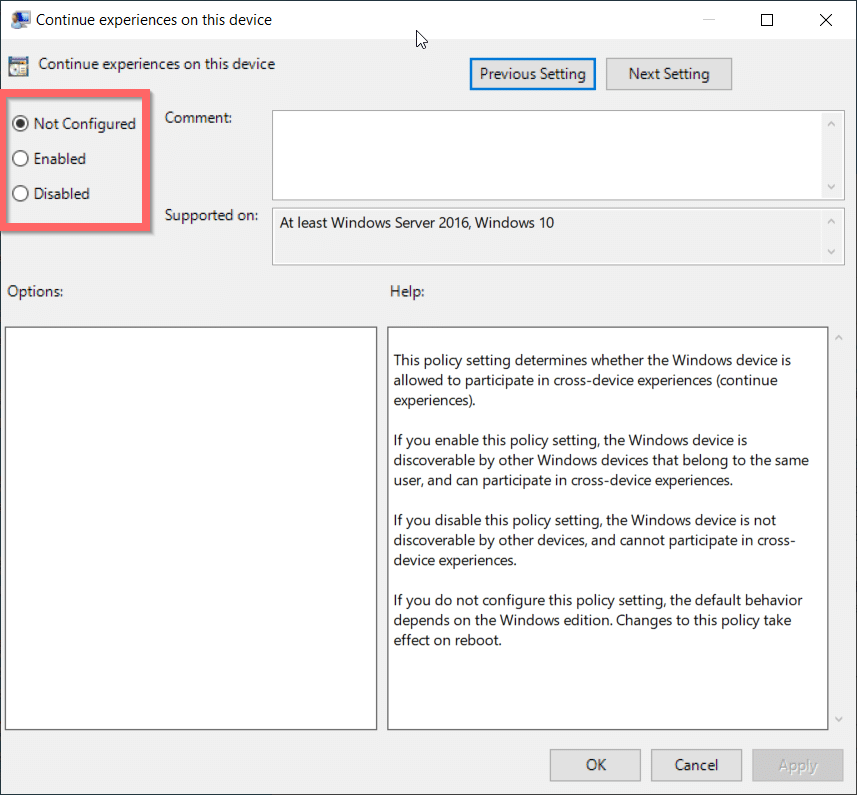
Note: Set to “ Not Configured“, by default. Or else, the Settings application worth in Windows 10.
- To disable Shared Experiences, examine the choice “ Disabled“. Click Apply. Shut the home window.
This will certainly operate in the Windows 10 Pro variation where you have manager advantages. House customers are not at obligation to utilize the Local Group Policy Editor.
- To allow this setup, inspect the choice “ Enabled“. This will use Shared Experiences throughout all the customers on this system.
Useful for Administrators of a network in an Office. They intend to disable Shared Experiences throughout all computer systems. Run a manuscript or set data to make this job.
- Type “ Registry Editor” in the Windows 10 Search box. This will certainly open up that application.
- Allow approval readying to make the application job.
- Go to the complying with course–
HKEY_LOCAL_MACHINE SOFTWARE Policies Microsoft Windows
- Right-click the Windows folder trick as well as develop the “ New” trick.
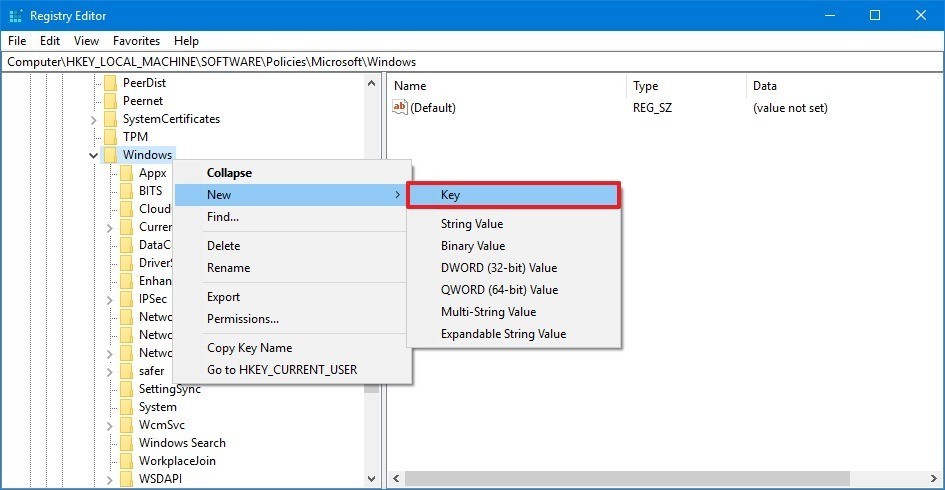
- Name the secret “ System” as well as push Enter.
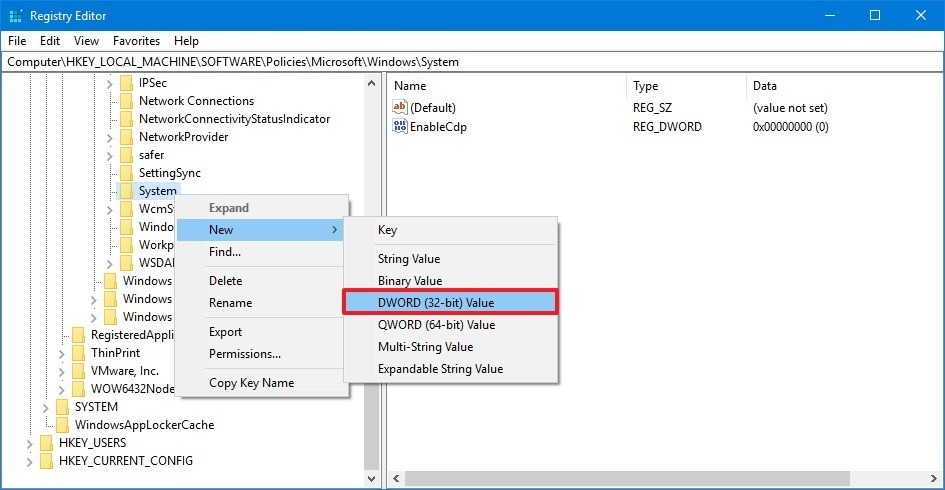
- Right-click the recently developed folder trick as well as develop “ DWORD(32- little bit) Value“.
- Name the secret “ EnableCdp” as well as push Enter.
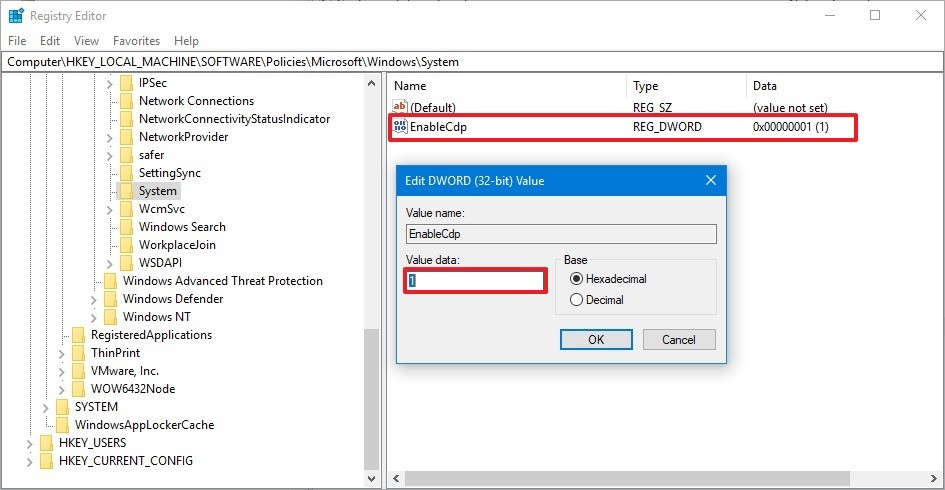
- Double-click the trick and also established worth “ 1“.
Close the Registry Editor. Reactivate the computer system to make pc registry setups function. From now-on, your Shared Experiences is handicapped on this computer system. This benefits Windows 10 Pro variations where you have manager benefits.
In situation, you intend to make it possible for the attribute once again, either remove the “ EnableCdp” trick or establish the worth to “ 0“. In this manner you will certainly obtain the regular performance of several gadgets connecting with Windows 10 system.