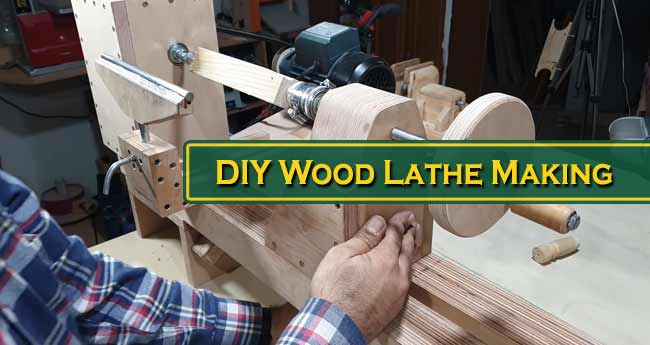
There are TWO benefits to making your lathe by yourself.
One, you get creative satisfaction. Two, it saves hundreds of bucks.
So, wouldn’t it be amazing to build your own wood lathe at home?
Yes, surely.
But is it too difficult to make one?
Nope, on the contrary, not at all. It’s pretty easy.
In this post, I’m going to show you the step by step process of building a lathe at home with things that are probably available at your home. In the meantime, if you want to have a look at the best wood lathes on the market, we’ve an article on that.
See Also: How to Use a Wood Lathe: Step By Step Guide For Beginners
Build Your Base
The Base is the most vital part of a wood lathe.
The base should be sturdily built in order to prevent vibration and to deal with the pressure exerted on it during the operation.
First, you have to laminate 2 pieces of ¾” birch plywood together. If you prefer spruce plywood, then you have to use 3 pieces each measuring ½”.
Afterward, you need to use construction adhesive to glue them together. But make sure that you split the pieces into a little bigger than usual size.
And once you have done the gluing, move the pieces to the end of width.
You need to use clamps when you glue the pieces together so that there’s no empty space in the plywood.
Dadoes
The base needs to be fastened to the top rail with 2 pieces of plywood, which are then fitted inside the dadoes.
You can use a dado stick to measure the perfect width.
If you don’t possess one, then you can cut a heavy block of wood with a saw to find the width.
The top rail looks like an extended dovetail. You may have to attach the other two pieces of plywood with glue to obtain the correct thickness. Once every single one of the parts is cut out, glue them together using wood glue.
See Also: How To Remove All Types Of Glue From Wood?
Headstock
Building a bearing mount is the first step in this process.
You can either use two sheets of plywood on either side or a strip of oak.
For bearing you can use a spade, provided that you have one.
Afterward, you have to build a support block by piling the pieces one above other.
Following that, you have to bolt two pieces of wood through the embedded nuts on each side.
If you rotate the bolts, then it will push against the piece of metal that moves toward the outside and secure the carriage.
In order to complete the build, you have to cut one more strip of plywood. Then drill it, and later screw the plywood piece to the lock.
Next, you have to add the hardware.
Finally, you will need to build the belt guard, which can be made with some ¼” plywood pieces.
Tool Rest
You can make the tool rest easily.
Get some woodblocks. And then Bolt a metal strip on top of it.
The metal strip will protect it against the chisels.
Tailstock
In order to create a live centre, you should employ a drill chuck which can hold the metal point.
You can even use an old chuck. Then you have to mount the bearing on a different track.
Following that, you have to glue the bearings using epoxy resin.
Motor Mounting
You need to attach the motor with bolts on a strip of plywood measuring ¾”.
Following that, mount the motor onto the base. It is recommended that you use 2 hinges in order to provide more rigidity.
Finishing
Nobody likes ugly machines. So, you’d like to give you lathe a nice appearance by painting it according to your preference.
Once you have painted the machine, brush a few coats of burnishing on the lathe.
Make sure that you do not touch the slide and leave it as it is.
Otherwise, it could become sticky, which may impede the movement of the slide.
Once your lathe has dried, it is ready to turn woods.
Final word
As you can see that building wood lathe at home is no rocket science. Even people without any prior knowledge of woodturning can make one by following instructions properly.
If you encounter any problems while making a lathe, please let us know. We will try to get back to you ASAP.
Few Other Lathe Discussions:
- What things to check before working with old lathe?
- Our list of good DRO for lathe

