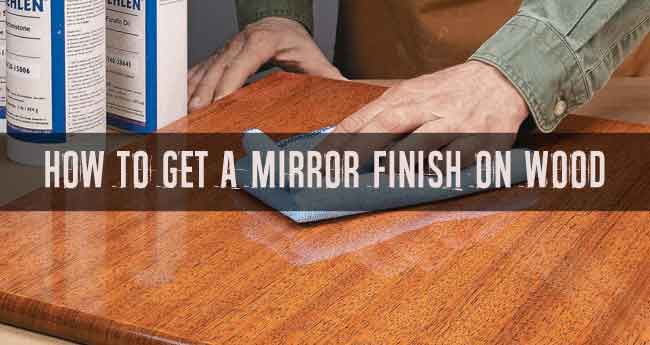
One of the largest obstacles while dealing with timber surfaces is to obtain a mirror surface on the timber. Woodworkers attempt various approaches and also strategies to attain that extremely gloss coating however just a couple of obtain the preferred outcomes.
It is reasonable due to the fact that woodworking entails a great deal of brushes, makers, and also a lot more specifically dirt fragments. It is nevertheless possible to accomplish a mirror surface on timber in spite of all these aspects.
You can just do it on your own. It will certainly simply need your full commitment, focus, as well as need to obtain a shiny coating.
So, do you desire that shiny coating?
You have actually concerned the best area. You can locate response to any type of inquiry that you have concerning your shiny coating in our compiled-up info on just how to obtain a mirror surface on timber. We have additionally some helpful pointers to maintain your surface clear and also glossy for an extended period.
Why demand a shiny timber surface?
Due to timber nature, it has a tendency to obtain light and also boring in time. It can shed its beauty and also radiate in it. Repaint or intense shade can provide your timber an appealing appearance. A sparkle in that tarnish or end up will certainly boost its appeal by several times as well as make it stand out amongst various other wood products.
No uncertainty, a gloss degree of timber surface will certainly influence exactly how its look. Also if you have old timber furnishings that is looking boring, you simply need to sand it and also offer it a brand-new coating. It will certainly reclaim its appeal.
An even more mirror-like gloss coating makes a timber sensational. These surfaces offer feelings of timber living. To obtain that seek to follow our standards appropriately.
How to obtain a mirror surface on timber: Step by action standard
‘ French Polishing’ is one of the most well-known strategy utilized for providing a mirror coating on the timber. Due to the dampness of shellac, that procedure can be lengthy. The very best choice technique on exactly how to obtain a high gloss surface on the timber is by utilizing a varnish or lacquer.
You can quickly spray lacquer yet if you are utilizing a varnish after that you have a selection in between both cleaning as well as splashing. You will certainly be extra comfy with splashing as it takes much less time and also is a very easy task.
However, if you wish to provide your timber a dynamic shiny appearance with discolor, pick a tarnish that is incredibly glossed. Use it after filling up grains. Constantly select a filler according to the tarnish you are mosting likely to use. Use a respirator as well as begin this job.
1. Sand the Curves
If you were incapable to do a treatment totally for the very first time, do not wait to offer it an additional shot. The most effective expert end result arises from devoted job as well as experience. Our genuine and also total info makes us certain to obtain you a high gloss surface on the timber.

For fining sand functions, begin it as smooth as feasible. Utilize an electrical sander to sand timber for the level and also surface area. Do it by hand where an electrical sander can not get to. As you do it by hand, deal with all the components just as.
Apply the very same development of sandpaper grits as well as begin with 80- grit. After fining sand away all the imperfections on timber, usage 120- grit and afterwards ultimately 180- grit. You can select various grits depending upon your job progression for finer cuts.
Always operate in the instructions of the timber grain. Scrapes are tough to see if they are alongside surface area while doing a hand sanding. They end up being noticeable after tarnishing. Sand it till you obtain an extremely level and also surface area.
As you do sand with an electrical sander, relocate on 1 inch per 2nd with minor stress.
Clean timber for any kind of dust nibs with a completely dry towel.
2. Grain Filler
Maybe you are servicing timbers like walnut, koa, mahogany, and so on. These timbers have big pores as well as surface area does not get back at after fining sand. To load these pores, make use of a grain filler. A grain filler is an item made use of for particularly loading these massive pores of the timber to obtain a high gloss surface.
Grain filler contains 3 items; a binder, a solvent, as well as a bulking representative. Both oil-based as well as water-based fillers have silica as a bulking representative and also mineral spirits or water as a solvent. You can pick either a water-based filler or an oil-based filler relying on which kind of surface you desire.
Take a paintbrush as well as scrub filler right into the timber pores. Rub out additional product quickly. If you have actually used filler exceedingly right into grains, hold an old bank card at the ideal angle to grain as well as tidy filler by drawing it towards the grain.
Clean it meticulously. The only objective is to maintain grain filler right into the timber pore.
Leave it to completely dry over night and after that sand it once more by utilizing a 220 or appropriate grit sandpaper. If you have not gotten a filler currently. Do not change it with a surface.
Because you do not intend to see your timber reducing gradually. A surface in timber pores will certainly make timber to agreement as well as these large pores will certainly once again show up.
3. Use Lacquer or Varnish
You must understand just how much amount of lacquer you intend to use. Keep that details amount for every layer. It will certainly provide a much smoother mirror-like coating. Use the initial layer of lacquer with a brush or a sprayer. Wait on it to completely dry.
A lacquer layer typically dries out within 15-20 mins. The most effective method is to leave it to completely dry for a minimum of 30 mins. If you are making use of varnish as opposed to lacquer, after that leave it for 3 hrs. Lacquer dries out quick as well as varnish requires time.
After seeing to it that lacquer has actually entirely dried out, sand the surface area to eliminate any kind of bumps. Usage 320- grit sandpaper. Tidy the dirt with a cloth. Analyze your job under light and also see if there is any kind of problem or flaw. Do the appropriate sanding for a smoother outcome.
Apply 2 even more layers of lacquer. For varnish, use a solitary layer. While using 2 layers of lacquer sand in between every one. Currently permit lacquer or varnish to completely dry for at the very least 1 day. Sand once again by utilizing a finer grit like 400 grit sandpaper.
For lacquer use 3 even more layers as well as for varnish use one layer. Always remember to sand each layer of lacquer prior to using one more. Make use of the very same sandpaper. Right now enable them to totally recover prior to additional case. Lacquer takes concerning a week to heal while varnish takes 2 weeks.
4. Wet-Sanding

Wet fining sand is really vital to offer a tidy crystal surface to your timber. This guarantees a level surface area by eliminating any kind of small scrapes that are left. Take a silicon carbide sandpaper and also usage water as a lube. Do damp fining sand by utilizing 400- grit sandpaper.
Gently sand the entire surface area. Currently usage 600- grit sandpaper on for 2nd damp sanding. Currently rub 800- grit sandpaper on it. Maintain duplicating the damp fining sand externally up until you really feel that there is no harsh area left on the timber.
It is simple damp fining sand in a round activity. It is best to do fining sand in the instructions of timber grains.
5. Rubbing
Rubbing substances are made use of to level the surface area and also are additionally referred to as degree substances. It functions by leveling the various stretches of various midsts. Sprucing up substances are popular to leave a glossy surface area. It does not smooth down any kind of scrapes.
Apply to scrub substance with a low-speed auto barrier. You can additionally make use of a scrubing substance by hand. Select a scrubing substance prior to brightening. If you have actually completely squashed the surface area via sanding, you can avoid this massaging treatment as well as straight use a gloss.
Rub externally equally. You can make use of a towel or old tee for this function. Begin by using a percentage of scrubing substance on the towel. Currently tidy all the surface areas appropriately as well as switch over to the brightening substance.
Polishing can be done by any type of type of brightening substance yet an extra typical method to do it is by utilizing pumice as well as rottenstone. Sprinkle water externally with a brightening substance. Beginning rubbing the surface area utilizing an electrical barrier or a sponge pad.
Even when you are utilizing any kind of equipment to rub the surface area, constantly complete it by hand buffing making use of a cotton dustcloth. For both brightening as well as massaging, choose a power barrier. Power barrier will certainly offer you a glossier surface.
Tips and also strategy of maintaining timber shiny for a very long time
Get a clear high gloss look on your following completing task for a long period of time with the aid of the below-mentioned suggestions.
1. Sand like a pro
With the aid of those technique, you will certainly have the ability to sand properly. Constantly attempt to utilize appropriate sand grits for your timber. After fining sand once, button to a finer sand grit. Do fining sand towards timber grain as well as not in round activities.
When your power sander isn’t reaching to a specific location, sand that part with hand and also do not miss it. No question sanding is the vital function to obtain a clear shiny surface. After fining sand, check out fully of timber to see a harsh spot. Where a timber still appears harsh, sand that component once again.
While checking out, beam the light at a reduced angle externally. This will certainly assist in disclosing all flaws as well as problems. You can likewise note that specific location where sanding is once again required with the aid of concealing tape.
2. Some blunders are alright
After using varnish, lacquer, or any kind of various other tarnish as well as finishing the procedure, simply leave any kind of blunders alone. If you have actually observed a little place of discolor that isn’t looking smooth or any type of various other small issue, it is not your mistake. Do not attempt to level that place.
Chances are that those places can be still sticky and also you will certainly wind up harming them a lot more. Source of these places can be small points like a little dismal fly caught in you complete. If you are still troubled by that place, you can attempt a couple of points.
Instead of cleaning and also over-coating, merely tweeze out that fly, hair, or any kind of various other bristle. While doing this, maintain your hand still. If there are little bubbles. pop them out with a little pin.
3. The far better brush is the remedy
It does not matter what kind of timber surface you are using on your timber, constantly pick a brush that is planned to use that certain discolor. The most effective method to use the polyurethane-based discolor is via the brush. Select an artificial brush for it. For oil-based spots, favor an all-natural layer brush.
Always select a high quality brush if you desire that high gloss views your timber. A top quality brush will certainly have the ability to hold even more tarnish as well as will certainly be very easy to manage. It is extremely much less most likely for a great brush to leave any kind of marks or bristles behind.
Always clean as well as tidy your brushes extensively since they will certainly conserve you from spending cash on even more brushes in the future.
4. Usage Wood Conditioner
If you are using an incredibly gloss discolor or any kind of various other surface, utilize a timber conditioner. A timber conditioner will certainly sustain the consistency and also mirror appearance of surface. In some cases because of irregular circulation of tarnish, some spots show up dark or light.

You can reduce these light and also dark places by using a timber conditioner prior to discoloration. Particularly, if you are high glossing timber like maple, cherry, birch, and so on
These timbers can play various methods of having unsightly darker areas. It is not feasible to end up that result however you can still prevent it with the assistance of a timber conditioner.
5. Security Issues
Before making use of any type of power device for your ending up task, constantly check out the standard on exactly how to utilize. Adhere to all the directions for making use of that device. Beware with safety and security cautions and also warns. Adhering to these directions can conserve you from a proposal crash or injury.
Keep the best safety and security mindset and also do not place every person around you at risk. While collaborating with ending up, maintain on your own tidy from any kind of product. Clean your hands appropriately. Put on handwear covers and also a respirator. Operate in an aerated location and also prevent functioning near any kind of warm resource.
While utilizing electrical devices, see to it that you have actually turned off after utilizing it. An unforeseen beginning of the device can lead to a wonderful harmful circumstance.
If something uncommon such as this takes place, do not stress and also switch off your equipment right away. Understand any kind of smell that can show over-heating if equipment.
Conclusion
Get a silky-smooth coating on your timber by merely following our actions on just how to obtain a mirror coating on timber. Crucial points to constantly keep in mind is doing every treatment appropriately as well as to not avoid any type of action. Every action is essential as well as is a should to provide your timber a smoother touch.
.