It’s that time of year when you’re longing for warmth as there’s snow outside. And you may want to have some eggnog while logs burn in the fireplace.
For that, you need seasoned woods, but instead of paying lots of money for seasoned firewood, why not season some wood yourself?
This article has been written to tell you how to season wood by fast and quickly yourself.
Let’s begin!
Why Do You Need to Season Wood?
As per a study done by the University of Tennessee, freshly cut wood contains a lot of water as it is circulated throughout the tree for food. Freshly cut wood contains about 66 percent and if this sort of wood is burnt, it will be very difficult to light it, and it will produce a lot of smoke.
So, it has been stated in the study that wood needs to have less than 20 percent moisture in wood for it to burn it effectively. Seasoned woods are lighter because it has very little moisture, it burns faster without producing a lot of smoke, and you can build furniture with them as well.
Before you can start seasoning wood, you should find out more about the type of wood because different wood requires different periods to dry properly.
Season plays a role in woods water content as well; for instance, in winter, the sap within the deciduous tree goes to trees roots for a short time, and so that is a good time to get wood as then it naturally has lower moisture.
Woods like hickory, black locust, and cherry are naturally low in moisture and so do not require much air drying. Whereas woods like American elm, oak, and cottonwood require drying over a long period, similar in nature is pine, which may take six to twelve months to dry.
You can use a moisture meter to measure the moisture content of the wood.
How to Season Wood Fast?
The process consists of 2 steps. Let’s get to know them.
- Step 1: Wood Collection and Preparation
Well, the first step is to collect wood. Get wood that is already chopped or chop it up yourself. The best time for collecting wood is summer as there are little rain and plenty of sun and air to dry the moisture from the wood. Cut the wood about 6-8 inches, in diameter and 16-18 inches in length.
- Step 2: Drying
There are three ways to dry wood, naturally drying, ventilation, and drying it by a kiln. Let’s talk about them.
Natural Drying
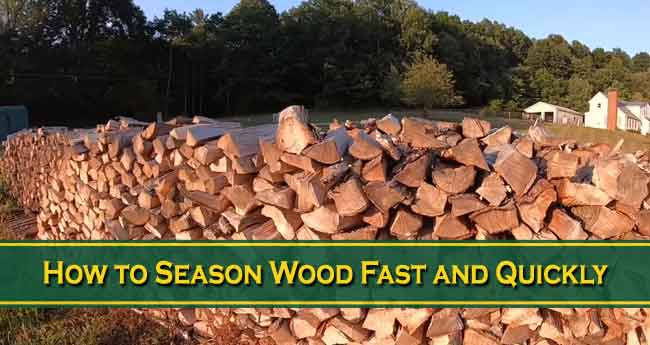
Now that you have your woods all chopped up, it’s time to stack them up. Stacking is an important step in the drying process. Freshly cut wood (or green wood) must be stacked in such a manner that allows the circulation of air. If you are drying naturally, make sure you keep woods in a sunny and well-aired place.

Try not to stack the wood on the ground, rather place something underneath the woods like straw. Also, make sure your storing place is free of termites or other pests that damage the wood.
Artificial Ventilation
The next method is drying wood through artificial ventilation. It is not the cheapest method out there, but it will dry wood faster. All you need to do is place woods on top of pallets or net bags and then place ventilators underneath the woods.
But you need to keep humidity in mind, the store where you will dry the woods must have humidity lower than 75 percent. Otherwise, the wood might become wet again. And since you are using electricity to run the ventilators, your expenditure might increase as you have to start the process all over again.
Kiln
Finally, you can also dry woods through the kiln. A kiln is a chamber designed with air ventilators and fans as well as a humidity controller so that you can dry woods faster regardless of weather or season.
Some kilns of a higher price even come with its own moisture meter that indicates the percentage of moisture left in the wood so you can decide whether to dry the wood more or less. The drawback of a kiln is that it is expensive, and drying woods in it doesn’t come cheap either.
One alternative for you is drying woods in your kitchen oven if you don’t want to buy a kiln or don’t have access to a kiln. Yes, your kitchen oven. However, this process requires a lot of attention if you are novice about the nature of woods and drying woods.
While the oven ensures that the dried evenly and fast (two-three hours instead of months outside), eliminates pests and molds, you will need to pay constant attention to it because, due to heating the wood at high temperature, it may catch fire inside the oven.
Also, unlike drying outside or inside a kiln, you can only dry two-three big pieces of wood at a time.
How to Dry Wood inside a Kitchen Oven?
Here’s the step-by-step process;
- First, arrange the racks inside your kitchen oven. Place one at the bottom and the other at the center. This way, you can ensure that air will circulate above and below the woods.
- Secondly, set the temperature of the oven. Be sure to set the temperature from 200 to 230 degrees Fahrenheit to preheat the oven. After 15-20 minutes, check to see whether your oven is ready to dry wood. If your kitchen oven has a convection fan, make sure to turn it on as well.
- If the pieces are big, place only one piece on one tray. And if you are drying smaller pieces of wood, make sure that they do not touch each other in any way.
- Be vigilant, and don’t just leave it to dry with timer. As the drying process usually takes up about an hour, check every 10-15 minutes to see whether everything is fine.
Keep a fire extinguisher nearby as a safety measure. After an hour, the wood should be dry, if not, keep it inside for another 15-20 minutes.
- After taking the wood out, let it cool down. If you see there’s some moisture left in certain places, just put it inside for another couple of minutes to dry. Otherwise, your work is done.
- Store the wood at a dry place.
Conclusion
Now that you know how to season woods fast, you can easily prepare for winter evenings. If you still have any more questions, let us know in the comments.