We know what you are thinking. Just grab a measuring tool and, well, measure! We hate to break it to you, but if you want the chain on the bar of your chainsaw to fit perfectly, you will have to know more than putting in a little more elbow grease.
So we’re here to make the process as simple as possible for you. Let’s begin, shall we?
Why Do I Measure This, Anyway?
The general rule is not to toss your chain out whenever you wish since there are easy fixes for issues like sharpness, lubrication, and so on. However, sometimes it becomes a necessity. Your chain may become dull, and chain links may start coming apart. You may begin to notice that the chain is beginning to come off the track, too.
To have your chain replaced, you will need to measure the components as precisely as possible. This is because the wrong chain size can harm the chainsaw as well as cause very dangerous accidents. Mismatched lengths may result in the chain skidding off the bar mid-task or the chainsaw not functioning at all.

That’s not all, though you may even need to replace the bar itself. It will be pretty clear when it’s time to get yourself a new one. You may see bending, twisting, or other types of disfiguration. The rail, or the portion of the bar the chain ‘hold on’ to, may become chipped and fail to keep the chain on during operation.
You can have the best chainsaw chain or bar in the market and use the top-rated bar and chain oil religiously it will still wear out eventually. So when you start noticing these telltale signs, it’s time to get a new one!
Safety First
We recommend you take two very small but indispensable steps to ensure your attempt at measuring the components does not go wrong. Not only should you switch the chainsaw off entirely, take a second to remove the spark plug. This way, you don’t risk switching the chainsaw on even by accident.
Secondly, let both the engine and bar cool off entirely before you start taking measurements. The components are hot enough to burn your skin right after use, so rule that out by letting the temperature drop.
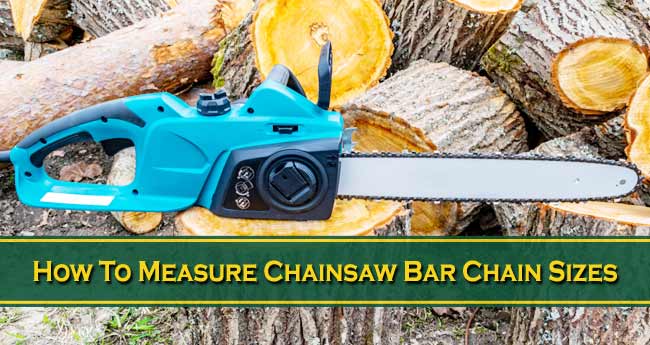
Chain Saw Chain and Bar Measurement Process
Part 1: The Bar
Measuring the bar is a fairly straightforward process. You will need to measure two lengths to have a fully measured chainsaw bar. The first length is the cutting length, the second being the overall bar length. The names are pretty self-explanatory, but we’ll explain it to you anyway.
Cutting Length
Start measuring the bar at the tip. Stretch your measuring tape to the part where the casing starts, or where the bar emerges from the casing. Round up the result to the nearest inch. You now have the measurement for the cutting length (also known as the ‘effective length’) of the bar!
Overall Bar Length
For the next bit, you will have to gather your screwdrivers. Remove the chainsaw casing by undoing the bolts. Be it plastic or steel; chainsaw casings are fairly simple to remove and readjust, so do not worry about ruining your chainsaw.
Next, measure the chainsaw from tip to tip even the bit that’s been hiding in the case all this while. Once you have done that, you have the overall bar length (also referred to as ‘true length’). Now that you have these two lengths, you have measured your chainsaw bar length fully!
Part 2: The Chain
The chain is the part of your tool that does the actual ‘cutting.’ Using a chain with the correct length will help you work seamlessly as well as avoid ugly accidents. To start, lay out the chain on a surface.
For a fully measured chain, you have to measure three things to find out the length of the chain: the pitch, the gouge, and the number of drive links.

Pitch
To measure the pitch, pick three rivets (the connectors) randomly and measure the length between the first and third rivet. Divide this length by two, and that is all you need to do to obtain the pitch of the chain.
Gauge
The gauge is essentially the thickness of the drive links, so it would be best measured using Vernier calipers. But who has one of those lying around at random anyway? Luckily, there’s an easier way to get this done using coins!
Grab a penny, a dime, and a quarter. Whichever fits into a groove without exerting any pressure is the one you should consider. A penny is equivalent to 0.058″, a dime signals 0.050″ and a quarter measures 0.063″. None of them fit just right? Then your chain probably has a gauge of 0.043″.
Number of Drive Links
If you examine your chain, you will notice a rounded-V shaped component at the bottom. You may also recognize them as the part that goes ‘into’ the bar. Those components are called the drive links. Once you have identified them, the rest is easy. Just count the number of drives links throughout the chain.
Once you have these three values, you are ready to purchase a new chain. All you have to do is mention these numbers to the salesperson or include them in your online search to narrow down the options.
Final Words
Being able to measure the bar and chain will save you a lot of time and effort when purchasing new components. It’s tougher than just whipping a measuring tape out to obtain a length, yet it’s easy enough for one to learn and skip the hassle of going to a professional.
However, if you are skeptical about your skills, we recommend going to a professional as using the wrong chain or bar can result in costly repairs of both the chainsaw and your limbs. Once replaced, maintain the components using proper sharpening tools, bar, and chain oil, etc. and remain free of worries for years to come!