A wood router is a potent and flexible tool, and the demand for it is very high when it comes to woodworking. You can create various unique edges onto your wood board with the help of this equipment.
If you have an interest in carpentry, you must have heard the term router table and woodworking router.
This is a versatile power tool that helps you to route complex and easy edges on hard wooden pieces. If you are a beginner and lack experience in working with a wood router, then today’s article is for you.
With little practice, you can perform an array of woodworking tasks with the perfect woodworking router. Using this tool is nothing so difficult. By following a few steps and practice, you can get perfection in your project. Let’s get into it without further ado.
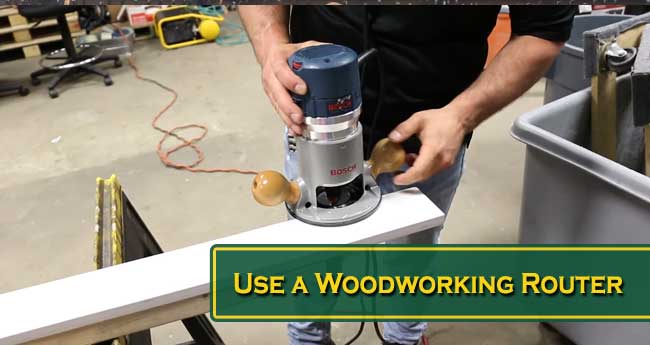
How to Use a Woodworking Router?
With a wood router, you will get a new level of experience, and it will save you time. Before you start using this, determine its exact usage.
Make a choice between fixed or plunge based router. Only then follow the steps below to know how you can use a woodworking router.

Step 1: Take Safety Precautions
It is a strategic step that you should take before you dive into your work. Use protective goggles and a pair of gloves to shield the vulnerable parts of your body.
You can also use a router table for your flexibility and ease of use. This table comes with an already fitted wood router, and with the help of this, you can move this equipment at any angle of your preference. If you are up for creating a masterpiece, use this table in all cases.
Step 2: Use the Right Router Bits and Install it for Your Project
There are various types of router bits like ogee bit, straight cutting dado bit, cove bit, round-over bit, and rabbeting bit. Each of them serves with a unique purpose with the woodworking task. So, choose the one that fits your requirements.
Install the router bit carefully into the collet and make sure it is fitted perfectly. If it isn’t, the bits will vibrate in uncertain speed and might create some uneven wood edges that will surely disappoint you.
This situation is critical because the uneven edges will force you to apply extra effort and spend an additional amount of time to solve the problem, and you wouldn’t want that, right!
After you are done installing the bits, the three-quarter of an inch of shank into the collet and give the overall installation a final check.
Both the plunge and fixed routers have a collet. This collet allows you to use several types of bits depending on your work types.
The range of bits is wide but below we have mentioned some of the most common bits-
- Cove Bit: For making a rounded profile on the edge of the stock or wood, use the cove bit.
- Roundover Bit: This bit will help you cut the round profile into the square one.
- Straight Cutting Bit: As the name suggests, with the help of this bit, you can create a straight or square channel into the middle of the wooden piece.
- Ogee Bit: It is also known as a Roman bit that helps to make an ornate S-shaped profile on the edge of the wood.
There is more to offer different types of profiles on the wood edge.
Router Bit Setup Tips:
Installing the router bit properly in the router’s collet is an important part. Improper installation will result in vibration and will lead you to an inaccurate rough finish. If you want proper finishing off the edges, the bit needs to be turned smoothly.
At first, check if the bit is sharp and clean enough. Likely ¾ of the shank is needed to place inside the router’s collet. Later on, do not forget to make sure you have tightened the bit securely.
Step 3: Select Accurate Router Motor Speed
Most of the wood router comes with adjustable motor speed. The speeds of the router bits are completely dependent on the rotation of the motor.
It is best that you take information from the website before you head out to buy. Type ‘your router name’ on Google, and you are good to go. From there, you will find different available information that will surely help you out.
The spinning of a router’s motor can be up to 25,000 rotations per minute (rpm). This means it rotates more than 400 times per second. But you can adjust this speed. So, if you do not need such a high speed lower the speed according to your task.
Not only your workpiece will look out of shape, your flexibility and ease of work will also be a challenging one. So, buy the one that comes with adjustable speed features.
Step 4: Shank Router Bit
From the woodworking supplier, you will find two different shank sizes of the bit to fit properly to the router collet. These two sizes are ½ and ¼ inch. Buy the proper size of shank before you start to use the router.
Step 5: Check the Wood Condition
There are various kinds of woods with different grains. You should be careful while you are using the wood router onto the grain. If you apply too much pressure, the woods might break into pieces. Make sure the bits are clean and not blunt. During the time of your cutting, move the router onto the line of the grain.
Step 6: Try To Avoid Splintering Wood
Some woods have strong grain, and if you do not take proper care, the wood will easily splint. To avoid or lessen this splintering, make sure you are using sharp bits of good condition.
Try to cut with the grain rather than cutting against it. Moreover, create several passes while cutting and avoid to cut in one go to finish the full depth cut.

Step 7: Control the Router Strategically
Most of the beginners make this mistake of moving the router along the wood. To get the best result, you need to advance the router in the opposite direction of its rotation.
Simply saying, move the router from the left to right when it is in a top-up setting. By doing so, you can get better control of the tool.
As mentioned already, you should avoid moving the router against the grain at all times. There were various cases where the beginners have made this kind of accident due to a lack of knowledge and technique. Be smart and strategic and apply a proper technique in this step with patience and accuracy.
To get the desired outcome, check the rotation of the router first, and then move in the opposite direction. In other words, move it from left to right direction.
By using this technique, you will get full control of this equipment, and it won’t get detached from your hand if you change the speed in any situation.
Step 8: Finishing Touch
Congrats! You are done with your woodworking task with the help of a wood router. After getting your desired masterpiece, clean the whole area with a vacuum cleaner. Not only that, wipe the wooden board with a clean cloth if possible.
Conclusion
As you have seen, the steps are very simple and easy for beginners if you get a good grasp of it. If you have a vision about creating a wooden masterpiece, the wood router will help you out, turning that desire into reality.
We hope you have found this article useful and have an excellent experience with the woodworking router in your upcoming project.
We would love to hear your feedback and experience.
Make your work an enjoyable one. Best of luck.
Thank you.