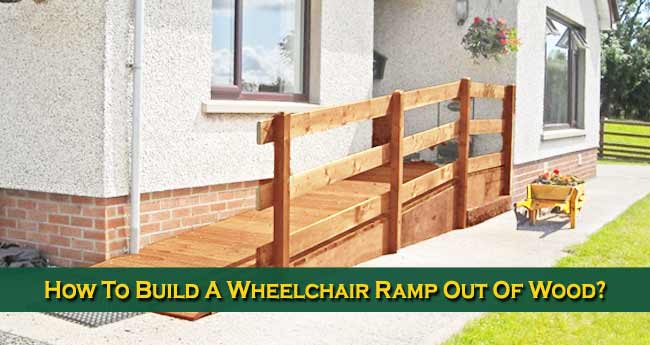
People often find it difficult for their old parents or any disabled family member or anyone who suffers from mobility challenges to enter the house – especially when the house is at a certain height from the ground – while the only way to go inside the house is stairs.
In such cases, making a ramp that is safe and helpful can make the physically disabled person feel independent. A hired contractor can construct it in a day or two.
Nonetheless, you can install it on your own too if you are equipped with a miter saw router, drill, level, and have some basic carpentry skills.
Process of Making a Wooden Wheelchair Ramp
Measurements
- The very first step is to estimate the distance from the doorstep to the ground.
- Make sure the exterior door you are selecting has sufficient space in the front to accommodate a ramp of 1: 20 slope, as this ratio is most suitable.
- But if you do not have enough space on the lawn, go for the ramp with a slightly steeper grade (of about 1: 12 or 1: 10).
Permission
If the ramp is above 30 inches from the ground, you might need a permit.
Footings
Permanent installation of ramps needs frost-proof footings to prevent frost heaving-caused interference with the door in the winter, whereas, treated plywood pads are enough for temporary use of the ramp.
Switch to Modules Instead of Long Spans
Long spans generally give adjustment problems, and if the changes are made in the original design, the adjustment becomes more complicated. Let’s say, almost impossible.
So, it is better to go with building individual modules and clamp them together at the vertical supports. You can also disassemble them and make a new design if needed.
Gap Details
- Upper landing of the ramp on door threshold and the place where ramp transitions to the ground are the important areas.
- It is better if the upper landing is within ⅜ inches level of threshold because the wheelchair’s front wheels cannot be passed if the gap is more.
Determining the End-point
End-point is the product of the distance from the doorway to the ground and the preferred slope.
The Actual Length of Ramp
If the ramp is built on a straight line, using the Pythagoras formula, the ramp length equates to the square-root of the sum of the squared rise height and the squared distance of end-point from the threshold.
Other Dimensions
The ramp must have at least 36-inches clear side-to-side space and a maximum 36 inches spacing from the top of the handrails to the ramp floor.
See Also: Used Wood Lathes: Should You Consider Buying?
Additional Requirements
- Details like whether any platforms, stairs or porches already exist to which a ramp could be connected.
- Whether there are any obstacles such as trees, buildings or walkways.
- Details of the surface (is it even?) where the lower end of the ramp is to be terminated. The surface should have a cross-slope of 1: 48 or less.
- Explicit and implicit code requirements imposed by the city or country.
- The specifications of how the ramp will be used may also affect the design.
Lumber Details
- 2×4 and 2×6 boards 16’ or less and 4×4 posts 10’ or less length of lumbers is generally purchased for efficiency and stability.
- Waste can be minimized by purchasing standard 5/4×6″ deck board.
- Assemble with screws and allow clearance of 42″ width between the posts and 39″ width clearance between railings.
- Posts to rest on 12×12” piece of treated ¾” plywood for ground support.
Construction of the Ramp

L-shaped ramp with a landing or a U-shaped ramp with a landing depends on the configuration of your home.
- To locate the upper platform, place a reference nail 1 ¾ inches in on both corners of your landing. This will be the attachment point of the cord to layout the landing.
- Place batter boards approximately 7 feet perpendicular to the house edge where the nails are placed.
- Use the mason’s cord to check for squares.
- When it is appropriately aligned, drive a nail into the batter board and tie the cord to it.
- Repeat the same steps on the right edge of the landing platform.
- Assuming a 60-inch landing platform, measure 58 ¼ inches from the wall along the cords on the left and right edges of the platform. Now, go on and mark them.
- Place two new batter boards 2 feet outside of the two existing cords such that, the mason cord that is tied to the new batter boards intersect the marks (on the previous two cords) made for proposed ramp width.
- The intersecting points and the house edges where the lines attach are the places where footings for the posts are dug, such that they reach below the frost line.
- At this point pour the concrete using sonotube and smoothen the top levels.
- Replace the mason’s cords and nail a plumb bob at the center of each post.
- Set J-bolts in the wet concrete.
- After hardening of the concrete, fix the metal post to J-bolt with a nut and washer.
- Repeat the above process for the next landing platform, considering the determined slope and run.
- Attach the rim joists and interior joists using joist hangers and 16d nails and use cross braces every 4 feet for added stability.
- The decking material is to be screwed down to the joists to prevent the boards from lifting over time.
- Corner posts are used as support for the railing posts as well. Railing section should not exceed 8 feet; otherwise, intermediary posts should be attached to the outer joists.
- The ramp ends with a landing of minimum 60 inches, of same materials as that of the ramp or the concrete.
The key point is, discuss with an architect before starting and make sure you have all the approvals needed for the ramp and you use only the treated timber.
Finally, an efficient and beautiful wooden wheelchair ramp will be ready which makes the lifestyles of the physically challenged (in mobility), more comfortable and independent to a great extent.
See Also:
- Wood Lathe Accessories: A Complete List for Newbies
- How to Distress Wood: The Ultimate Guideline for Beginners
- How To Remove All Types Of Glue From Wood?

